I was pleased to find that the following products are available on Amazon. Two reasons: I love their delivery schedule/free or very small overnight surcharge. And because they inventory almost everything anyone would ever need or want, purchases via credit card have limited exposure. Anyone who has had their card compromised knows what a pain it is to track down all relevant links.
My original stash of beautifully colored/perfectly cut card stock and pre-folded note cards w/envelopes came from the Ace Hardware/Craft Store in Kona, HI. Go figure/it's one of my favorite stops.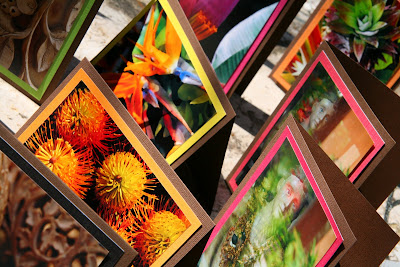
Now it’s easier than ever to produce professional products that you’d be proud to share.
My Big Find centered around beautiful backgrounds available in 12 colors, 4.5" X 6.5" which is PERFECT for mounting 4 X 6 photos! My three favorites: Textured Pastels, Brights and  Textured Jewels. The A7 note cards (5 1/4 inch by 7 1/4 inch with matching envelopes/12 pack) are from American Crafts, available on Amazon.
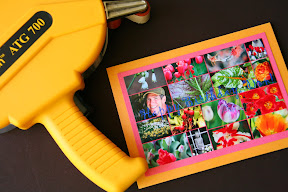
Whether you have your photos printed online, locally or at home, here’s an item you’ll wonder how you ever lived without: The 3M Scotch ATG700 Adhesive Applicator.  Simply the best and fastest way to affix photos to cards and/or any paper product to another paper product. Just squeeze the trigger, slide over paper surface and the glue slides out in strips. Please note additional information at bottom of post.
If you love photography as much as I do and want instant access to your photos, a good home printer is crucial.
My wireless All-In-One HP Printer/FAX/Copier/Scanner (C7250) is apparently no longer available/I did find a used model online when searching today. Check out Costco/perhaps they still carry my older model. I was able to find another HP Photosmart All-in-One Printer that, while more expensive than mine, uses HP 02 color cartridges which, I'm convinced, make a HUGE DIFFERENCE in print quality. And flexibility when replacing cartridges.
My other Big Secret is this: Photo Paper. Here’s what I use: HP® Soft-Gloss Premium Photo Paper, 4 x 6, 100 Sheets per Pack .
.
While it’s a substantial investment both initially and when replacing ink cartridges, you might derive enormous pleasure, as I do, when printing top-quality photos, constructing creative cards and then being able to share the results with friends and family. It's impossible to put a price tag on a Big Smile.
Update on Saturday, May 22, 2010 at 8:31AM by
 Lois
Lois
You absolutely need special transfer tape, either 1/2" or my favorite, Adhesive Transfer Tape Roll for Scotch Tape Gun, 3/4 . This is the key ingredient to successfully adhering two surfaces together.